> ## Documentation Index
> Fetch the complete documentation index at: https://zeropath.com/docs/llms.txt
> Use this file to discover all available pages before exploring further.
# Quick Start
> Get started with ZeroPath's AI-powered security platform in just a few minutes
## Signup
1. Go to [auth.zeropath.com/sign-up](https://auth.zeropath.com/sign-up) to create your account
2. Choose between:
* **Personal Workspace**: Free tier for individual developers
* **Organization**: Team workspace with advanced features
***
## Add Your Repo
Give ZeroPath access to scan your code and perform automatic PR reviews. 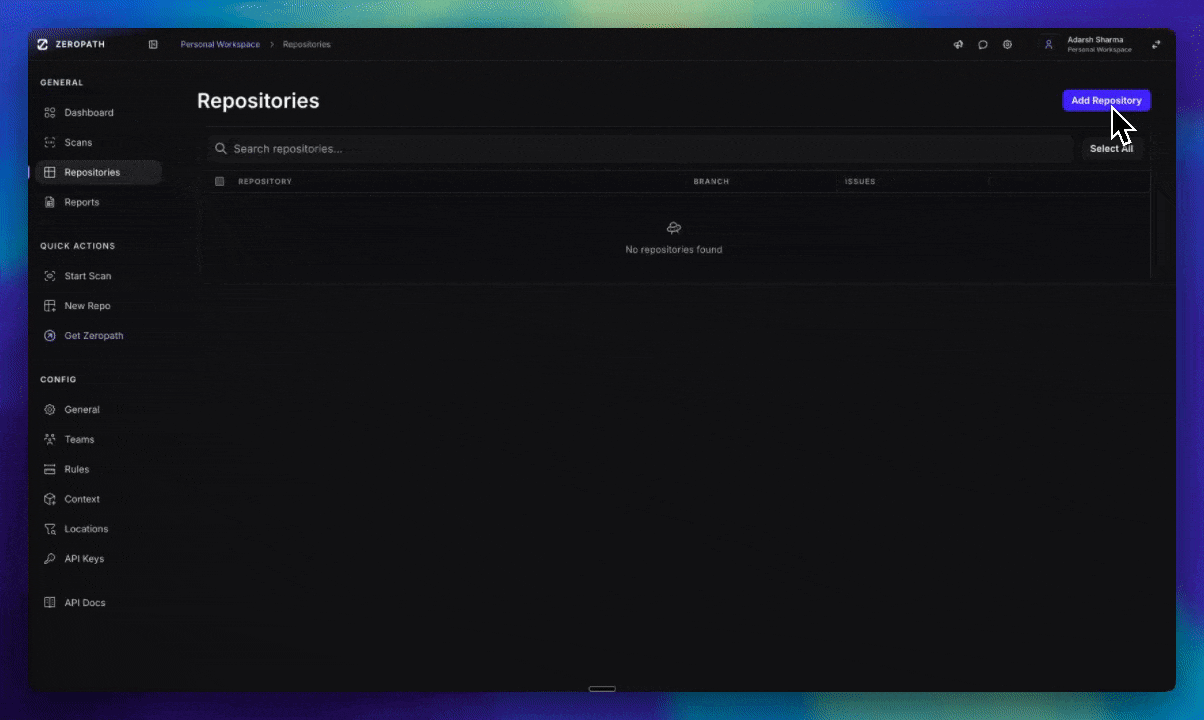 ### Connection Method
Connect GitHub repositories for automated PR reviews and continuous scanning.
Go to [Add Repositories](https://zeropath.com/app/repositories?m=AddRepos) in your ZeroPath dashboard
Click "Install GitHub App" (GitHub App tab should be pre-selected)
On GitHub's side:
1. Select your organization
2. Choose repositories to grant access to
3. Approve the permission set
If you are not already logged in to ZeroPath, you will be redirected to the login page first. After logging in, the installation will resume automatically.
You'll be redirected back to ZeroPath. Wait for repositories to appear under "Accessible repositories" (syncing indicator will show if still processing)
Select which repositories to add to ZeroPath, or click "Add All"
Enable "Auto Add" to automatically add new repositories when you grant access in the future
Connect GitHub repositories using a personal access token for scanning only.
Token-based connections have limited features: auto PRs, PR checks, and other GitHub flows are not available. Use GitHub App for full functionality.
Go to [GitHub Settings > Developer settings > Personal access tokens](https://github.com/settings/tokens) and create either:
* **Fine-grained token**: With read permissions for repository contents
* **Classic token**: With `repo` scope for read access
Go to [Add Repositories](https://zeropath.com/app/repositories?m=AddRepos) in your ZeroPath dashboard
Click "Use An Access Token" button
1. Paste your GitHub personal access token
2. Enter the full GitHub repository URL (e.g., `https://github.com/owner/repo`)
Click "Add Repository" to complete the token-based integration
Integrate with GitLab for merge request scanning and pipeline security.
Create either a group or project access token in GitLab:
1. Go to your GitLab group/project settings > Access Tokens
2. Set **Role** to "Maintainer"
3. Add required **Scope**: `api`
4. Set **Expiry** to 1 year from now
5. Click "Create token" and copy the token
See GitLab's official documentation for detailed token creation steps
Go to [Add Repositories](https://zeropath.com/app/repositories?m=AddRepos) in your ZeroPath dashboard
1. Click the "GitLab" tab
2. Click "Setup GitLab Integration" button
1. Select token type: **Project** or **Group**
2. Enter **GitLab Domain** (e.g., `gitlab.com` for cloud customers)
3. Paste your **Access Token**
4. If using a group token, enter the **Group Name**
After configuration, repositories will appear under "Accessible repositories". Select which repositories to add to ZeroPath.
#### Option 1: OAuth Integration (Recommended)
Go to [Add Repositories](https://zeropath.com/app/repositories?m=AddRepos) in your ZeroPath dashboard
1. Click the "Bitbucket" tab
2. Click "Setup Bitbucket Integration" button
You'll be redirected to Bitbucket to authorize ZeroPath. This enables full functionality including PR scanning, webhooks, and automated reviews.
After the OAuth callback, repositories will appear under "Accessible repositories" for selection.
### Option 2: Access Token
In Bitbucket, create a new repository access token with these permissions:
* **Repository**: Read, Write
* **Pull Requests**: Read, Write
* **Webhooks**: Read and Write
Go to [Add Repositories](https://zeropath.com/app/repositories?m=AddRepos) in your ZeroPath dashboard
1. Click the "Bitbucket" tab
2. Click "Use An Access Token" button
3. Enter your access token and repository URL
Connect Azure DevOps Services organizations for repository imports, full scans, pull request
scans, status checks, PR comments, and patch pull requests.
Azure DevOps support is for Azure DevOps Services cloud organizations. Azure DevOps Server is
not included in this setup path.
#### Option 1: Microsoft Entra OAuth (Recommended)
Go to [Add Repositories](https://zeropath.com/app/repositories?m=AddRepos\&tab=azureDevOps) in your ZeroPath dashboard
Click the **Azure DevOps** tab, then click **Setup Azure DevOps**.
Enter your Azure DevOps Services organization URL, such as
`https://dev.azure.com/my-organization`.
Continue through the Microsoft consent screen. ZeroPath stores encrypted credential material
and uses it to list repositories, create service hooks, scan pull requests, and open patch
pull requests.
After the OAuth callback, repositories appear under **Accessible repositories**. Select
repositories to add, or click **Add all accessible Azure DevOps repositories**.
#### Option 2: Personal Access Token
In Azure DevOps Services, create a PAT with repository read/write access, pull request
thread read/write access, status/build access, and service hook management access.
In the Azure DevOps setup dialog, switch to **Personal Access Token**, enter your
organization URL and PAT, then click **Connect with PAT**.
Once ZeroPath validates the token, import individual repositories, selected batches, or all
accessible repositories.
See the full Azure DevOps setup, scope, and troubleshooting guide.
Scan any publicly accessible Git repository by providing its URL.
Go to [Add Repositories](https://zeropath.com/app/repositories?m=AddRepos) in your ZeroPath dashboard
Click "Public Git URL"
1. Enter the public Git repository URL (e.g., `https://github.com/user/repo.git`)
2. Select the branch to scan
3. Configure scan settings
Click "Start Scan" to begin the one-time analysis
Upload your codebase as a ZIP file for one-time security analysis.
Ensure you have a real repository zipped
Go to [Add Repositories](https://zeropath.com/app/repositories?m=AddRepos) in your ZeroPath dashboard
1. Click "Upload Repository"
2. Name your repository in the UI
3. Upload the ZIP file (this may take a minute)
Use our command-line tool to upload and scan code from your terminal.
See the complete CLI guide for installation, authentication, and usage instructions
### Review Basic Settings
Set up your scan preferences:
* **Branch Selection**: Choose which branch to monitor and ensure they exist
* **PR Scanning**: Optionally, disable automatic PR Checks (enabled by default)
* **Scanner Settings**: By default, ZeroPath is configured for SAST, SCA, IaC, and Secrets by default, with a low confidence permissiveness setting.
***
## Start a Scan
1. Review your configuration settings
2. Click **"Start Scan"** to begin analysis
3. Your scan will process in the background
### Monitor Progress
Track your scan status:
* **Scan Status**: View progress at [zeropath.com/app/scans](https://zeropath.com/app/scans)
* **Detailed Logs**: Click on the "Running time" to view scan logs
* **Notifications**: Configure alerts via [Slack integration](https://zeropath.com/app/settings/integrations) or [webhooks](/webhook/introduction)
* **Estimated Time**: Varies by repository size. First-time full scans take longer while indexing the codebase, but subsequent scans are 10x faster
PR scans typically complete in under a minute, while full repository scans may take longer on the first run.
## Getting Help
Explore our comprehensive guides and tutorials
Join our Discord community for tips and support
Contact our support team for assistance
Check platform status and uptime
### Connection Method
Connect GitHub repositories for automated PR reviews and continuous scanning.
Go to [Add Repositories](https://zeropath.com/app/repositories?m=AddRepos) in your ZeroPath dashboard
Click "Install GitHub App" (GitHub App tab should be pre-selected)
On GitHub's side:
1. Select your organization
2. Choose repositories to grant access to
3. Approve the permission set
If you are not already logged in to ZeroPath, you will be redirected to the login page first. After logging in, the installation will resume automatically.
You'll be redirected back to ZeroPath. Wait for repositories to appear under "Accessible repositories" (syncing indicator will show if still processing)
Select which repositories to add to ZeroPath, or click "Add All"
Enable "Auto Add" to automatically add new repositories when you grant access in the future
Connect GitHub repositories using a personal access token for scanning only.
Token-based connections have limited features: auto PRs, PR checks, and other GitHub flows are not available. Use GitHub App for full functionality.
Go to [GitHub Settings > Developer settings > Personal access tokens](https://github.com/settings/tokens) and create either:
* **Fine-grained token**: With read permissions for repository contents
* **Classic token**: With `repo` scope for read access
Go to [Add Repositories](https://zeropath.com/app/repositories?m=AddRepos) in your ZeroPath dashboard
Click "Use An Access Token" button
1. Paste your GitHub personal access token
2. Enter the full GitHub repository URL (e.g., `https://github.com/owner/repo`)
Click "Add Repository" to complete the token-based integration
Integrate with GitLab for merge request scanning and pipeline security.
Create either a group or project access token in GitLab:
1. Go to your GitLab group/project settings > Access Tokens
2. Set **Role** to "Maintainer"
3. Add required **Scope**: `api`
4. Set **Expiry** to 1 year from now
5. Click "Create token" and copy the token
See GitLab's official documentation for detailed token creation steps
Go to [Add Repositories](https://zeropath.com/app/repositories?m=AddRepos) in your ZeroPath dashboard
1. Click the "GitLab" tab
2. Click "Setup GitLab Integration" button
1. Select token type: **Project** or **Group**
2. Enter **GitLab Domain** (e.g., `gitlab.com` for cloud customers)
3. Paste your **Access Token**
4. If using a group token, enter the **Group Name**
After configuration, repositories will appear under "Accessible repositories". Select which repositories to add to ZeroPath.
#### Option 1: OAuth Integration (Recommended)
Go to [Add Repositories](https://zeropath.com/app/repositories?m=AddRepos) in your ZeroPath dashboard
1. Click the "Bitbucket" tab
2. Click "Setup Bitbucket Integration" button
You'll be redirected to Bitbucket to authorize ZeroPath. This enables full functionality including PR scanning, webhooks, and automated reviews.
After the OAuth callback, repositories will appear under "Accessible repositories" for selection.
### Option 2: Access Token
In Bitbucket, create a new repository access token with these permissions:
* **Repository**: Read, Write
* **Pull Requests**: Read, Write
* **Webhooks**: Read and Write
Go to [Add Repositories](https://zeropath.com/app/repositories?m=AddRepos) in your ZeroPath dashboard
1. Click the "Bitbucket" tab
2. Click "Use An Access Token" button
3. Enter your access token and repository URL
Connect Azure DevOps Services organizations for repository imports, full scans, pull request
scans, status checks, PR comments, and patch pull requests.
Azure DevOps support is for Azure DevOps Services cloud organizations. Azure DevOps Server is
not included in this setup path.
#### Option 1: Microsoft Entra OAuth (Recommended)
Go to [Add Repositories](https://zeropath.com/app/repositories?m=AddRepos\&tab=azureDevOps) in your ZeroPath dashboard
Click the **Azure DevOps** tab, then click **Setup Azure DevOps**.
Enter your Azure DevOps Services organization URL, such as
`https://dev.azure.com/my-organization`.
Continue through the Microsoft consent screen. ZeroPath stores encrypted credential material
and uses it to list repositories, create service hooks, scan pull requests, and open patch
pull requests.
After the OAuth callback, repositories appear under **Accessible repositories**. Select
repositories to add, or click **Add all accessible Azure DevOps repositories**.
#### Option 2: Personal Access Token
In Azure DevOps Services, create a PAT with repository read/write access, pull request
thread read/write access, status/build access, and service hook management access.
In the Azure DevOps setup dialog, switch to **Personal Access Token**, enter your
organization URL and PAT, then click **Connect with PAT**.
Once ZeroPath validates the token, import individual repositories, selected batches, or all
accessible repositories.
See the full Azure DevOps setup, scope, and troubleshooting guide.
Scan any publicly accessible Git repository by providing its URL.
Go to [Add Repositories](https://zeropath.com/app/repositories?m=AddRepos) in your ZeroPath dashboard
Click "Public Git URL"
1. Enter the public Git repository URL (e.g., `https://github.com/user/repo.git`)
2. Select the branch to scan
3. Configure scan settings
Click "Start Scan" to begin the one-time analysis
Upload your codebase as a ZIP file for one-time security analysis.
Ensure you have a real repository zipped
Go to [Add Repositories](https://zeropath.com/app/repositories?m=AddRepos) in your ZeroPath dashboard
1. Click "Upload Repository"
2. Name your repository in the UI
3. Upload the ZIP file (this may take a minute)
Use our command-line tool to upload and scan code from your terminal.
See the complete CLI guide for installation, authentication, and usage instructions
### Review Basic Settings
Set up your scan preferences:
* **Branch Selection**: Choose which branch to monitor and ensure they exist
* **PR Scanning**: Optionally, disable automatic PR Checks (enabled by default)
* **Scanner Settings**: By default, ZeroPath is configured for SAST, SCA, IaC, and Secrets by default, with a low confidence permissiveness setting.
***
## Start a Scan
1. Review your configuration settings
2. Click **"Start Scan"** to begin analysis
3. Your scan will process in the background
### Monitor Progress
Track your scan status:
* **Scan Status**: View progress at [zeropath.com/app/scans](https://zeropath.com/app/scans)
* **Detailed Logs**: Click on the "Running time" to view scan logs
* **Notifications**: Configure alerts via [Slack integration](https://zeropath.com/app/settings/integrations) or [webhooks](/webhook/introduction)
* **Estimated Time**: Varies by repository size. First-time full scans take longer while indexing the codebase, but subsequent scans are 10x faster
PR scans typically complete in under a minute, while full repository scans may take longer on the first run.
## Getting Help
Explore our comprehensive guides and tutorials
Join our Discord community for tips and support
Contact our support team for assistance
Check platform status and uptime